|
|
| Author |
Message |
Ranko
Joined: 13 Jul 2006
Posts: 3
PS Version: CS1
OS: Mac OS X.4.11
|
|
|
|
|
 |
helcyon
Joined: 02 Oct 2005
Posts: 191
PS Version: CS3
OS: OSX 10
|
 Posted: Sun Jan 06, 2008 12:21 am Post subject: Posted: Sun Jan 06, 2008 12:21 am Post subject: |
 |
|
I would say use the clone and stamp tool along with the healing brush.
_________________
www.kg-studios.com |
|
|
|
|
|
Matt
VIP

Joined: 24 Sep 2007
Posts: 3515
Location: Haverhill, UK
PS Version: Lightroom 5, CS4 & Elements 11
OS: Windows 8.1
|
| Posted: Sun Jan 06, 2008 6:15 am Post subject: |
|
|
Hi there
I downloaded your work and had a little play with it.
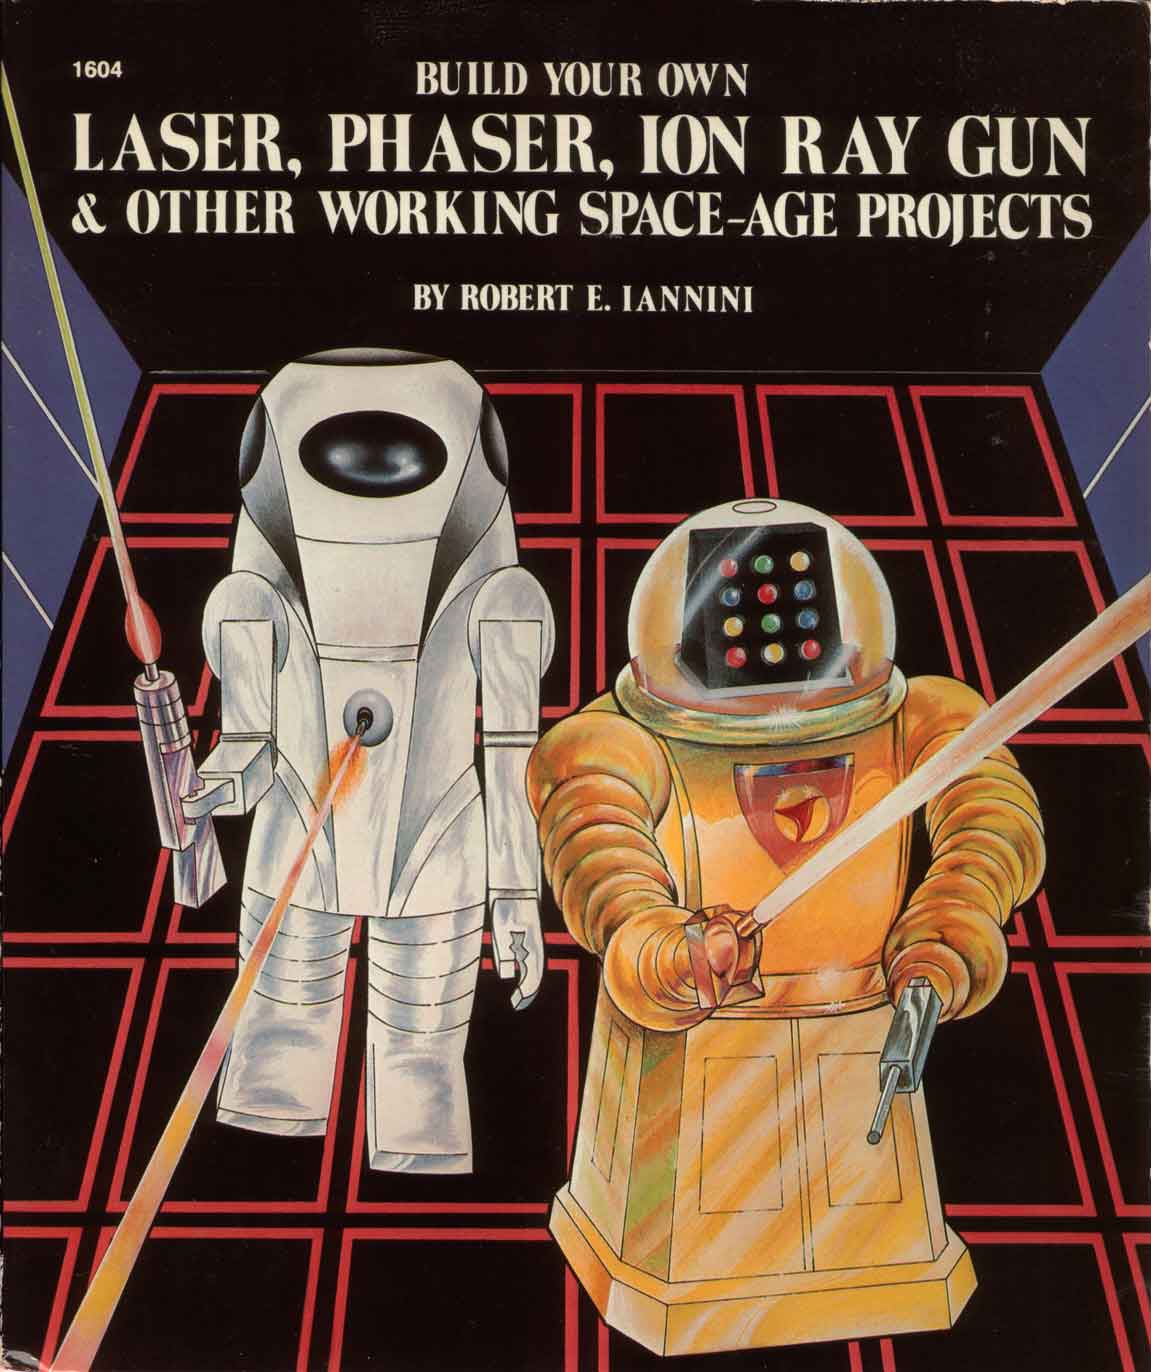
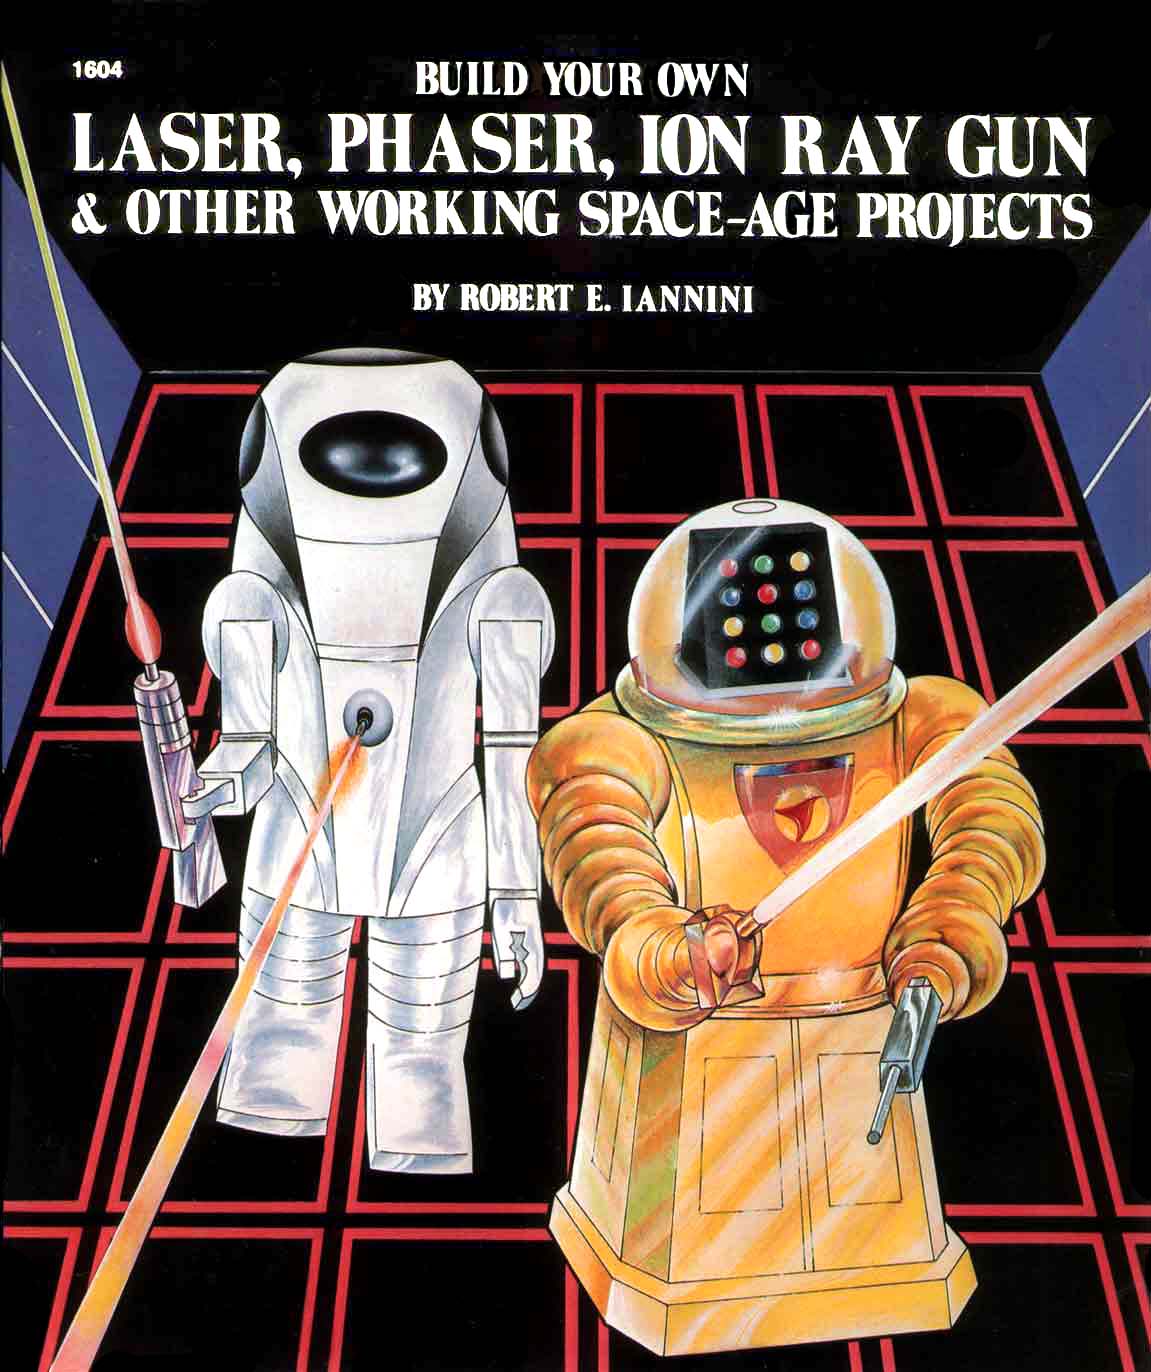
When I looked more closely at the image I was horrified to see the amount of JPEG compression artifacts that exist. If you look at the blue area you'll see what I mean. I assumed you've downsampled it to get it on the site but if you haven't, or scanned straight into the JPEG format, will have you the chance to scan it again? Maybe into the PNG or TIFF (preferred) format? JPEG isn't such a good choice for line art and text etc.
It's hard to know what a corrected version of this image should look like seeings as I've never seen the original, however I started by forcing the background to black and a section of the robot to white using the eyedropper tools inside Levels. I then applied another levels adjustment layer and worked on setting the text to white (not sure if this is how it's meant to be though) and then masking out everything else in the image.
I then used the clone stamp tool (as suggested by helcyon) and a few selection methods to rid the image of bubbles and scratches. I then started cleaning up the text (the best I could) by painting away the stray pixels around the letters. I only got as far as 'build your own' before I started realising just how bad some of those compression artifacts are.
I'm sure you'll have better luck with the high resolution original scan!
Hope this helps
| Description: |
|
| Filesize: |
161.1 KB |
| Viewed: |
289 Time(s) |
|
_________________
Matt
3photoshop.com
http://www.3photoshop.com |
|
|
|
|
|
Ranko
Joined: 13 Jul 2006
Posts: 3
PS Version: CS1
OS: Mac OS X.4.11
|
| Posted: Mon Jan 07, 2008 9:17 am Post subject: |
|
|
| helcyon wrote: | | I would say use the clone and stamp tool along with the healing brush. |
It's slow-going, but that is working.
| mattyboy777 wrote: | Hi there
I downloaded your work and had a little play with it.
When I looked more closely at the image I was horrified to see the amount of JPEG compression artifacts that exist. If you look at the blue area you'll see what I mean. I assumed you've downsampled it to get it on the site but if you haven't, or scanned straight into the JPEG format, will have you the chance to scan it again? Maybe into the PNG or TIFF (preferred) format? JPEG isn't such a good choice for line art and text etc.
It's hard to know what a corrected version of this image should look like seeings as I've never seen the original, however I started by forcing the background to black and a section of the robot to white using the eyedropper tools inside Levels. I then applied another levels adjustment layer and worked on setting the text to white (not sure if this is how it's meant to be though) and then masking out everything else in the image.
I then used the clone stamp tool (as suggested by helcyon) and a few selection methods to rid the image of bubbles and scratches. I then started cleaning up the text (the best I could) by painting away the stray pixels around the letters. I only got as far as 'build your own' before I started realising just how bad some of those compression artifacts are.
I'm sure you'll have better luck with the high resolution original scan!
Hope this helps |
Yeah, I just made that for this site. The original I'm working with is a large TIFF. The artifacts made me cringe, too. 
|
|
|
|
|
|
helcyon
Joined: 02 Oct 2005
Posts: 191
PS Version: CS3
OS: OSX 10
|
| Posted: Mon Jan 07, 2008 2:16 pm Post subject: |
|
|
If you are using the stamp/healing tool, another good tip on using that is to make and use paths.
Either use the marquee, or draw paths with the pen tool. Once you create the path, load it as a selection. This way you can clone specific sections without going into part of the image you dont want to. This also helps to keep straight/precise lines. If you want precise lines that are not hard, just feather the selection.
_________________
www.kg-studios.com |
|
|
|
|
|
|