Joined: 18 Mar 2005
Posts: 201
Location: N.B., Canada
Posted: Sun May 22, 2005 3:35 pm Post subject: Complete Signature Tutorial
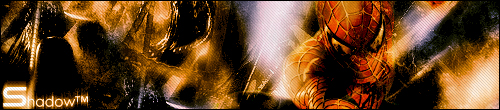
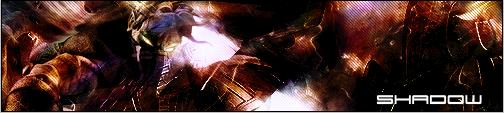
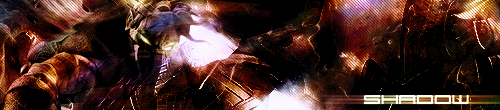
I've noticed a lot of people have trouble blending their renders into their image or background, I'm going to show you how I blend my renders. There are 2 ways to do this. The first way is harder. I call it multilayer blending, mostly used in grunge sigs or sigs with more layers, etc. The second way is a lot easier and only deals with a background and your render. I call that single layer blending. I'm also going to show you how to do a unique multicolor technique that I do in most of my signatures such as these two:
Part 1: Multilayer Blending/Sig Tutorial
Create a new document, whatever dimensions you like. I'll be using 500x110. Make sure your background is white.
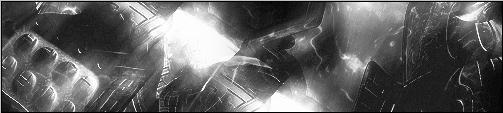
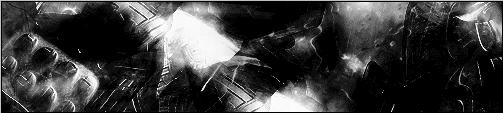
Step 1. Open a background or create a new one, hit SHIFT+CTRL+U to desaturate. Here's my background layer:
Step 2. Make a new layer and make sure your foreground color is black. Take any brushes you want. They should be over 100 pixels. Start brushing around the layer and make it black, just enough so that you can barely see the image, now put the blending mode to soft light.
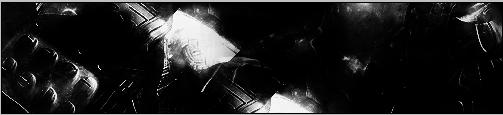
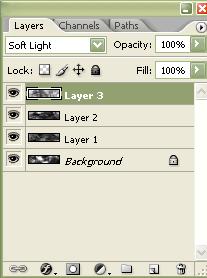
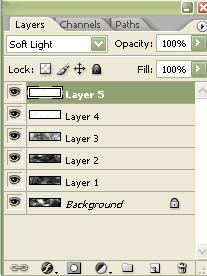
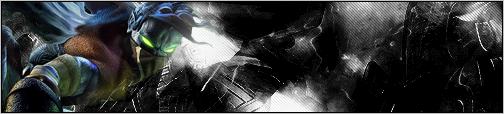
Step 3. Repeat step 2 until you have 3 brushed layers. Here is my signature thus far in addition to my layers palette so that you can compare yours to mine to ensure that it is correct.
Step 4. Make a new layer, but this time change your foreground color to white and do the same thing as in step 2, but only make 2 white brushed layers. Your signature and layers palette should now look a little something like this:
Step 5. OK, now we're at an experimental stage. You can do whatever you want at this point just to spice it up a bit. I'm going to add diagonal scan lines to my image.
The way I do my scan lines is to put them down to maybe 20%-30% opacity, then maybe do some selective scan lines. Selective scan lines is when you cut out certain parts of the scan lines to bring out brighter parts of your sig. To do selective scan lines, grab your polygon lasso tool with a 10-25% feather. I use 25%. This ties into our blending renders later on. Here's mine so far:
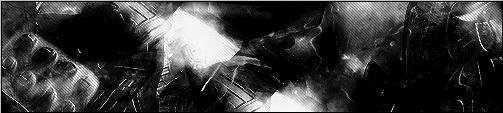
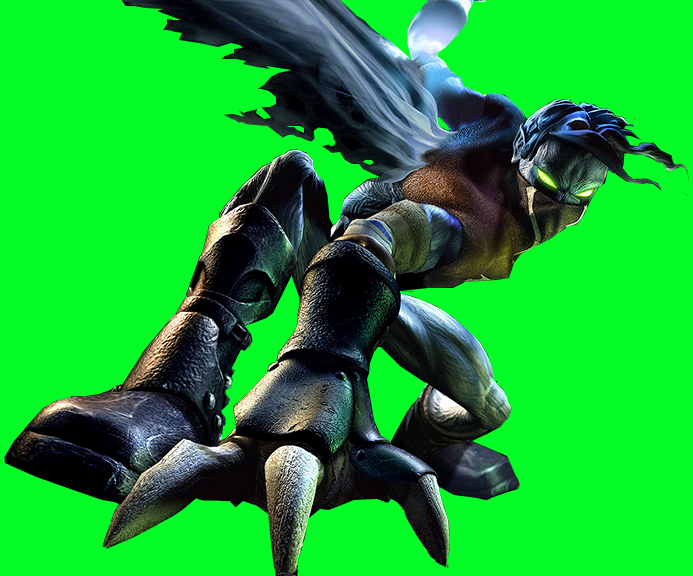
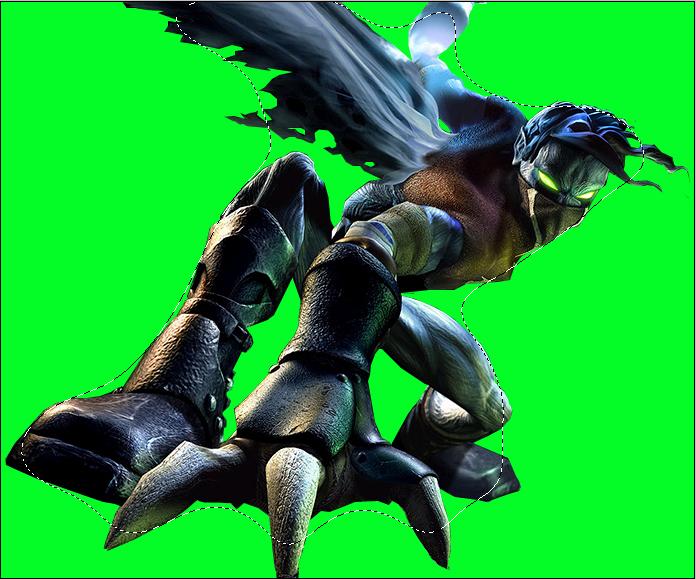
Step 6. Finally!! We are finished with our sig! You might want to save about now, just incase something unexpected happens. Go to file/open and find a render or picture you want in your signature. If you don't have one yet, get one off of the internet, whatever you want. I'll be using this render:
This is by far may favorite render. It's got a very good position to it. I've only used it twice and this would be my third time using it.
Step 7. Now starts the blending process. Grab your polygon lasso with a 25 pixel feather and start cutting out around the image. It doesn't need to be perfect because it'll smooth out for you. This works best with renders on a white background.
Now hit CTRL+C to copy the selected image or area.
Step 8. Go back to your signature and hit CTRL+V. You may have a bit of excess color on the outside of your render. Take your magic want tool and click on the color you want to get rid of. It should select only the excess colored area. Then hit CTRL+X to get rid of it. Once you've done that, you may have to transform your image. Hit CTRL+T, hold shift and click and hold to drag on a corner and transform your image to the size you want. After that you should notice that the outside of your render is already blended, but the rest of it isn't all that blended. We'll fix that.
Step 9. Now, move your render to the second to last brushed layer. It should be called Layer 2, unless you named them yourself. It's one of the black brushed layers we did before. You can either put it below the first one or the second one, which ever looks better to you. I'm putting it under the second black brushed layer.
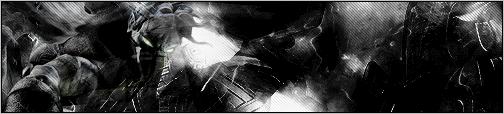
After you've done that, duplicate your render, put the blending mode to overlay, make sure your original render is on top (the one that's set to normal), change the opacity to somewhere between 70%-80% and desaturate it with SHIFT+CTRL+U. Now, it's fully blended, but there is still some color that is barely visible. Just leave it. Remember what I said about selective scan lines? Well, we're using that here. Just go back to your scan lines layer, which should be the top layer and cut around your render with a 25 pixel feather. Now we're done with this part of the tutorial. Here's mine so far:
Part 2: Multicoloring
Now I'm going to show you how to do a nice multicolor technique. I'll be using the signature I used in the tutorial above.
Step 1. Go to layer/new adjustment layer/color balance and make it any color you want. But, make sure it's distinctive, because were going to be making more then one color balance layer. I'm going to be using 3 colors: red, blue and yellow. After you've made it the color you want, invert it with CTRL+I. Now the image should be desaturated as it was before.
Step 2. Repeat step 1 2 more times. You should then have 3 colors inverted so you can't see them and your layers palette should look something like mine, unless the rest of your layers have been merged. But, you should still have these 3 color balance layers.
Step 3. Grab an airbrush from the brushes menu and make sure your foreground color is white. It should be one of the defaults and it should be no smaller then 20 pixels - maximum 35 pixels, because we don't want too much of one color. This is what the top bar should look like for your brush. Use these same settings.
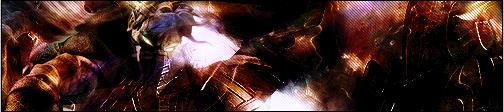
Now start randomly brushing the 3 black layers or do some smart brushing. Make sure you have some diversity between your colors and go over different colors for overlapping color effects. I just go wild most of the time. That's it, here's my colored image:
Part 3: Single Layer Blending
This is basically what we did before in the first tutorial section, but just the basics. Open the background you want to put the image on.
Step 1. Open your render, grab your polygon lasso tool with a 25 pixel feather and cut it out (it doesn't have to be perfectly cut out). Then use CTRL+C to copy.
Step 2. CTRL+V to paste. Cut out the excess background with the magic wand tool unless the background was transparent. The image is now partially blended.
Step 3. Duplicate your render, put the blending mode to overlay, bring your normal blended render to the top layer, put its opacity somewhere between 50%-80% - whatever looks better.
Step 4. SHIFT+CTRL+U to desaturate your top blended layer and your done. You can add whatever else you want to make it look better or desaturate the bottom layer since were not using multilayer blending.
Part 4: (Bonus) Text and Effects
The easiest part in my opinion and My favorite. I'm going to show you a text effect I use a lot.
Step 1. Type in your name or whatever you want in your sig. I'm using my name with the 911 Porche font. Text placement is important, so place it in a good spot, where the effects will be visible. You can move it to a different spot later if you want, but here's my placement.
Step 2. Duplicate your text layer. DON'T MOVE IT! Go to filter/blur/motion blur and go by these settings: angle: 0. Distance: 100 pixels.
Step 3. Now link the 2 layers and merge them, so that you can move both of the text layers at the same time. Here's mine so far:
Step 4 (optional). Depending on if you merged all of your layers or not, you should put your text layer(s) underneath your color balanced layers to get a good colored effect.
Here's the finished product:
I hope you enjoyed this tutorial and I hope it helped.
Joined: 22 Mar 2005
Posts: 384
Location: rhode island
Posted: Sun May 22, 2005 6:07 pm Post subject:
hey, shadow, great tut:) i tried it out with another chaser guy but used ur bk. except i added some tech under the red and above the blue and yellow layers
Joined: 18 Mar 2005
Posts: 201
Location: N.B., Canada
Posted: Mon May 23, 2005 8:54 am Post subject:
ya i noticed in ur sig lol, but try to make your own background with filters, I made a god gradient tutorial, that shows you how to make a kind of inferno background, i'll post that here later, it should help you in just making a cool simple background with effects.
Joined: 22 Mar 2005
Posts: 384
Location: rhode island
Posted: Mon May 23, 2005 2:28 pm Post subject:
k i will thnks. i red your inferno tut. like i said in that post, al i ever do is with gradianbt, until that sig. thats how i got that big blue face guy thing, lol
i seem to almost always get weird things. every sig ive evr made is with gradiant, gradiants always come out differently and can look good alot.
well heres how mine turned out. i lost ya on a couple of steps because i just bout photoshop yesterday and i know nothing at all! What you think?
I added some different colors to kind of be created and explor a little but im still a newb at it so this is how it turned out
Joined: 08 Jun 2005
Posts: 864
Location: Jersey, Channel Islands, UK
Posted: Fri Aug 05, 2005 2:32 am Post subject:
Thats a nice result you got there Jonny Bravo, i think you could make the text stand out more by changing the colour, but nice work, oh and welcome to photoshop forums.com _________________ www.jerseyhacker.co.uk
Joined: 18 Mar 2005
Posts: 201
Location: N.B., Canada
Posted: Tue Aug 09, 2005 12:38 pm Post subject:
nice work on it, just try some stronger colors like dark blue red and yellow, and get some better renders into ur sigs and better blending. _________________ Space Artist
www.shadowtm.deviantart.com
All times are GMT - 6 Hours Goto page 1, 2, 3, 4Next
Page 1 of 4
You cannot post new topics in this forum You cannot reply to topics in this forum You cannot edit your posts in this forum You cannot delete your posts in this forum You cannot vote in polls in this forum You cannot attach files in this forum You cannot download files in this forum