|
|
| Author |
Message |
briansansone
Joined: 03 Feb 2009
Posts: 2
Location: Atlanta, GA
|
 Posted: Tue Feb 03, 2009 9:18 am Post subject: Fading a pic to 0% screen Posted: Tue Feb 03, 2009 9:18 am Post subject: Fading a pic to 0% screen |
 |
|
Thought I knew more than I actually do!
I would like to be able to fade a picture into nothing(0% screen in print
lingo). I would also like to be able to fade one pic into another.
For example, starting at the left top of the canvas, fade one picture
diagonally into the next picture, and then into another picture ending at the bottom right.
Thanks for the help!
Brian 
|
|
|
|
|
 |
combiBob
Joined: 11 Mar 2008
Posts: 188
Location: Florida
|
| Posted: Fri Feb 06, 2009 6:42 am Post subject: |
|
|
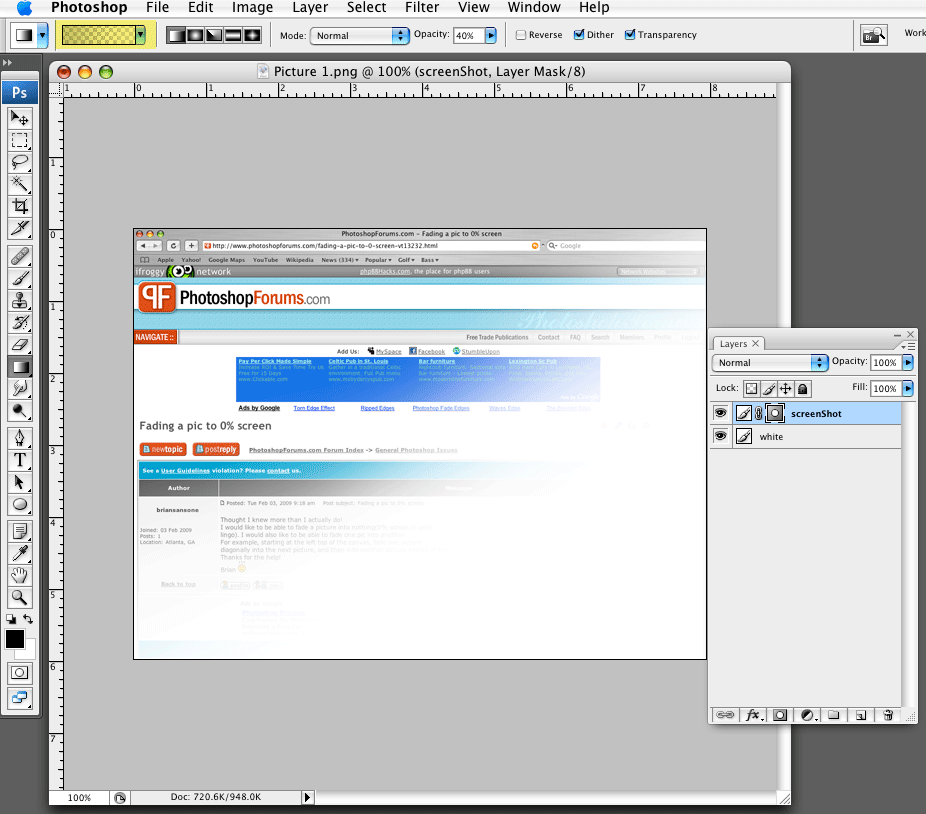
OK. Blending image to white or image to image.
You have 2 layers. Solid white on the bottom, your image on the top.
Click the top layer and then click the layer mask icon.
Select your gradient tool, pull down on the gradient picker (highlighted in yellow) and set it to foreground to transparent. Then set the opacity to 40%.
Change your color picker to default (D) and pull the gradient from the bottom right, to the top left. Because your opacity is set at 40%, you'll have to do it several times at slightly different directions to mask the entire right corner. This also helps break up some banding that would occur if you set your opacity to 100%.
Essentially, you're "erasing" the top layer and letting to bottom layer show through.
Image to image is just having another picture on the bottom layer instead of the white.
Hope that made sense.
| Description: |
|
| Filesize: |
106.09 KB |
| Viewed: |
322 Time(s) |
|
|
|
|
|
|
|
Patrick
Administrator

Joined: 14 Feb 2003
Posts: 11945
Location: Harbinger, NC, U.S.A.
|
| Posted: Fri Feb 06, 2009 4:04 pm Post subject: |
|
|
|
|
|
|
|
|
briansansone
Joined: 03 Feb 2009
Posts: 2
Location: Atlanta, GA
|
| Posted: Mon Feb 09, 2009 4:52 pm Post subject: |
|
|
Hey, thanks so much!
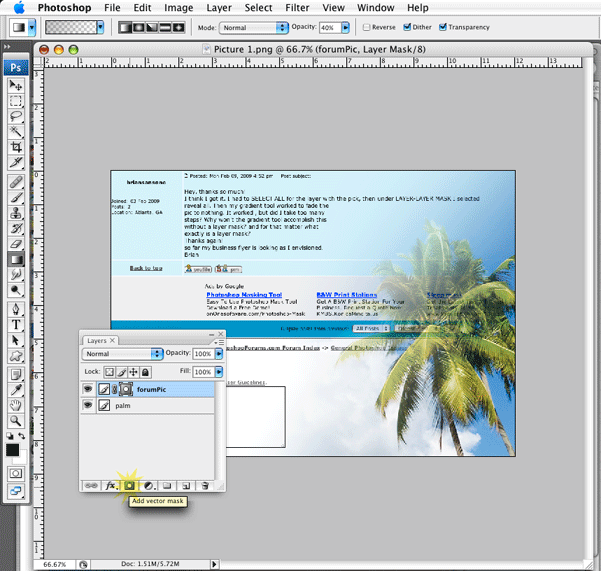
I think I got it. I had to SELECT ALL for the layer with the pick, then under LAYER-LAYER MASK I selected
reveal all. Then my gradient tool worked to fade the
pic to nothing. It worked , but did I take too many
steps? Why won't the gradient tool accomplish this
without a layer mask? and for that matter what
exactly is a layer mask?
Thanks again!
so far my business flyer is looking as I envisioned.
Brian
|
|
|
|
|
|
combiBob
Joined: 11 Mar 2008
Posts: 188
Location: Florida
|
| Posted: Tue Feb 10, 2009 10:15 am Post subject: |
|
|
Hey Brian,
Glad to hear your flyer is shaping up as expected. A success story!
You need only hit the layer mask icon (highlighted in yellow) to get a layer mask.
The main reason for using layer masks is the ease of editing. You can blend with the gradient tool, brushes or even the eraser tool. They all work. But imagine figuring out how to add or subtract either one of the layers below without a mask. Possible? Sure. Extremely fast and accurate? No. Fun for the next guy in the studio to pick up and work on? Yikes.
Layer masks allow you to "paint" an image in or out depending on what's in the color picker.
| Description: |
|
| Filesize: |
99 KB |
| Viewed: |
281 Time(s) |
|
|
|
|
|
|
|
|


