|
|
| Author |
Message |
Auieos
Joined: 29 Jan 2010
Posts: 2019
|
 Posted: Thu Feb 03, 2011 5:00 pm Post subject: How to Make a Glossy Button Posted: Thu Feb 03, 2011 5:00 pm Post subject: How to Make a Glossy Button |
 |
|
In this tutorial, I am going to show you how to create a glossy button.
Create new document with a white background that is 500px by 500px in size.
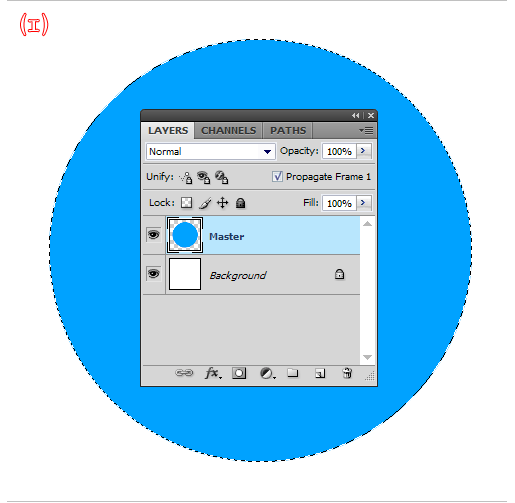
Create a new layer above the white background and call it "MASTER".
On the MASTER layer, use the elliptical marquee tool while holding shift to create a perfect circle. Make sure it uses up about 80% of the canvas and that anti-alias has been checked. Use the arrow keys to position it if it is off center.
Fill it with any color by using paint bucket tool and you should have something like the image below.
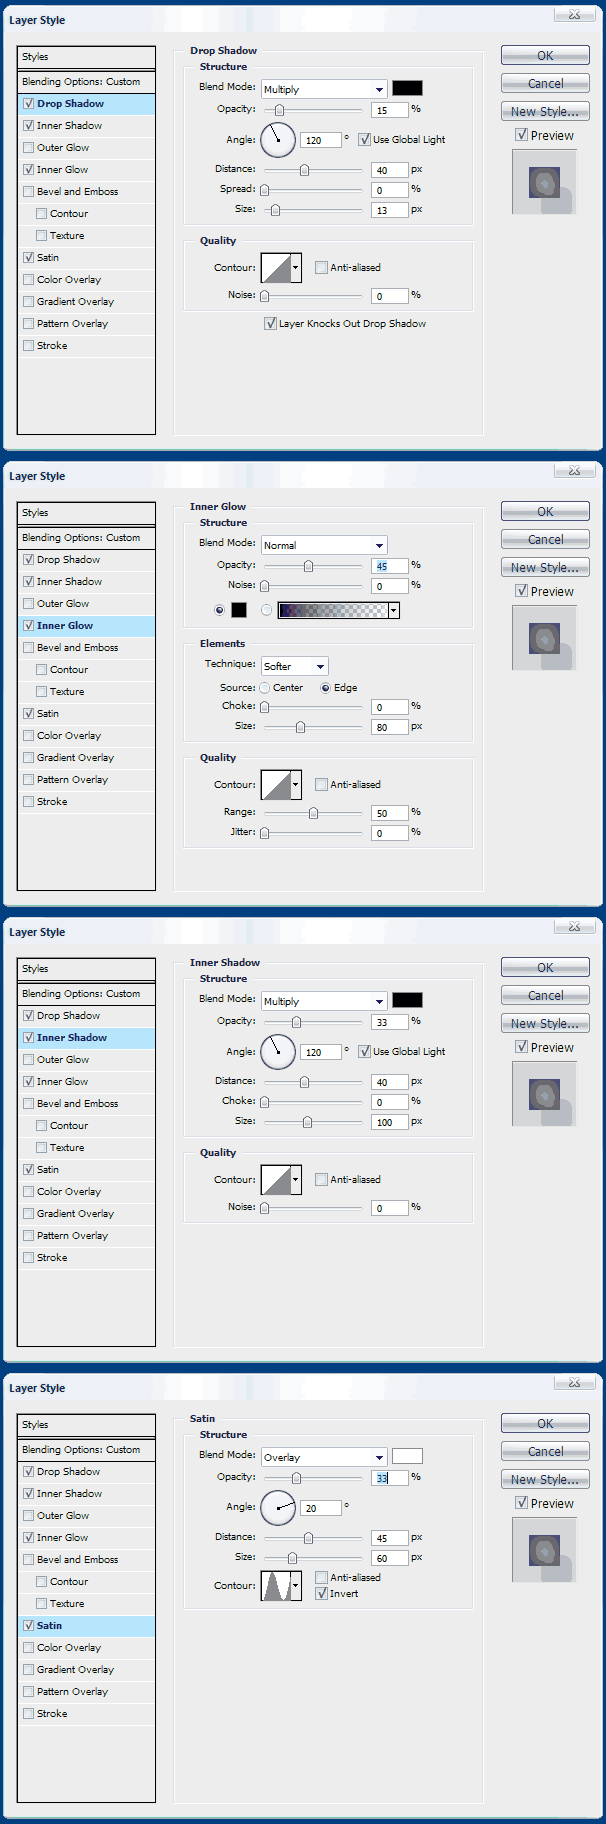
Double click the layer to open the layer styles menu. Apply layer FX in the manner outlined below.
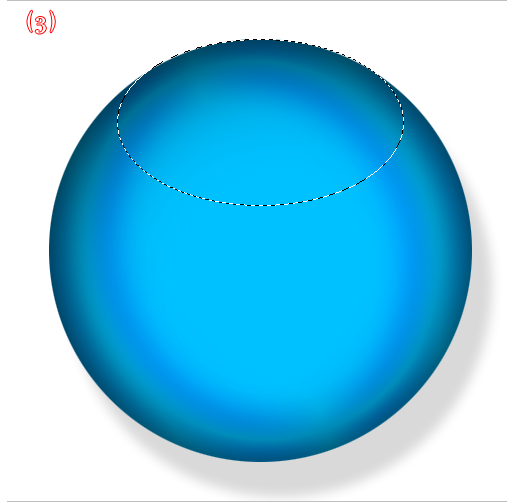
Create a new layer above MASTER and call it "GLARE BIG".
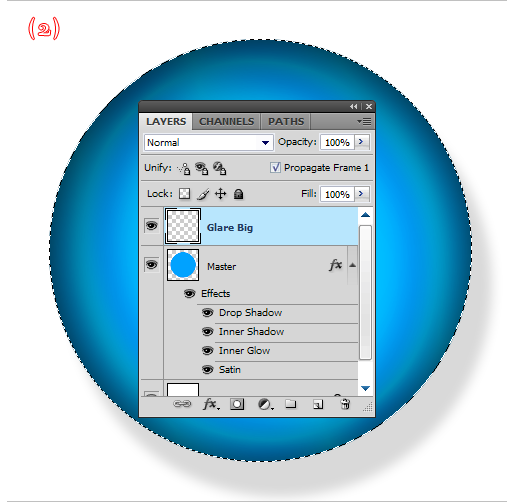
Hold CTRL on your keyboard and click the MASTER layer thumbnail if you have lost the selection of your circle. Make sure the GLARE BIG layer is now highlighted as the working layer.
Navigate to Select > Transform Selection and hold the SHIFT key while transforming vertically and the ALT key while transforming horizontally.
Transform until you have an oval that takes up approximately 2/3 of the circle horizontally and 1/3 of the circle vertically.
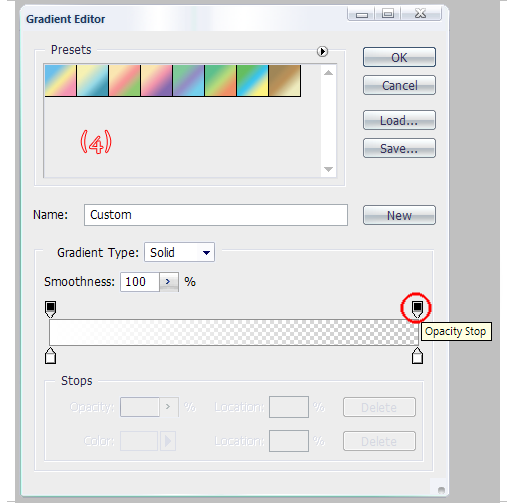
Fill the selection using the gradient tool with a white to white gradient. One of these whites should be 100% transparent. Make sure to hold the SHIFT key to keep the gradient vertically straight when using the tool.
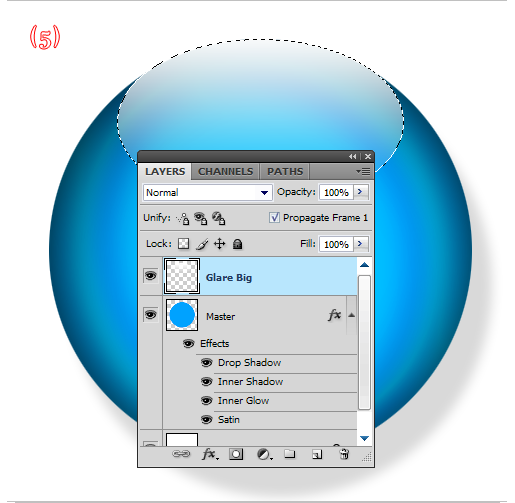
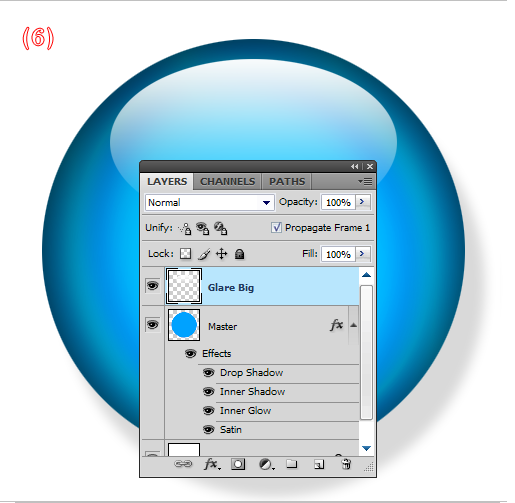
If the GLARE BIG layer looks out of position, such as being too high on the circle, move it down into a more appropriate spot using the arrow keys.
Duplicate the GLARE BIG layer and call it "GLARE EDGE1".
Hold the CTRL key on your keyboard and click the GLARE EDGE1 layer thumbnail to create a selection.
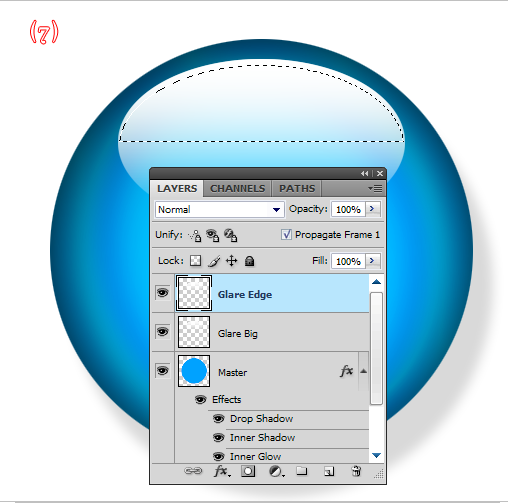
Make sure one of the marquee tools is active. Use the arrows to move the selection down by only around 5px.
Next, press delete to remove all but a thin edge of the duplicated gradient.
Now it should be starting to look nice with one side of the reflection being completed.
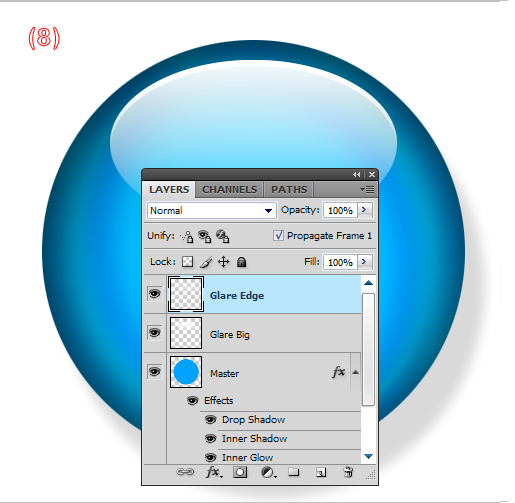
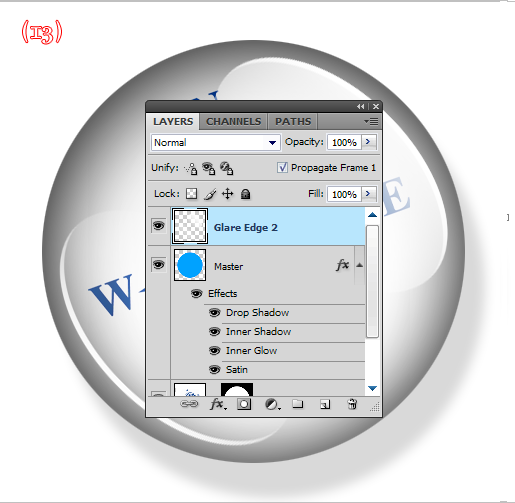
Duplicate the GLARE EDGE1 layer and call it "GLARE EDGE2".
Hold the CTRL key on your keyboard and click the layers (not the thumbnails this time), so that both the MASTER and GLARE EDGE2 layers are highlighted.
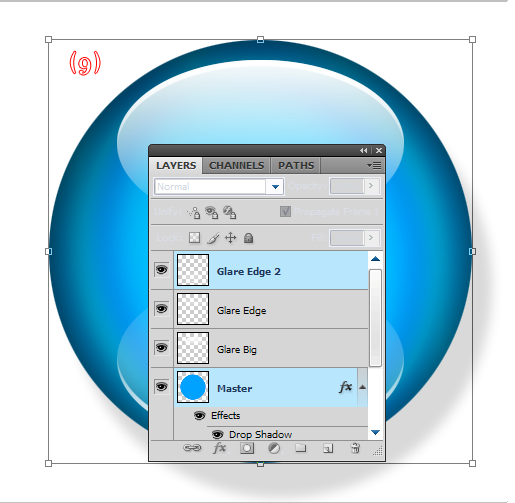
Hold the CTRL key on your keyboard and press the T key to transform rotate the GLARE EDGE2 layer around to the opposite side of the circle.
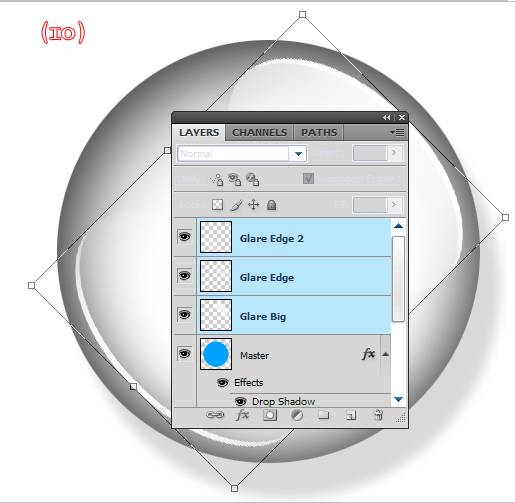
Reduce the MASTER layer's fill setting to 0%. Fill is underneath the layer transparency setting.
Hold CTRL on your keyboard and click all three GLARE layers. Once just the GLARE layers are highlighted, hold the CTRL key on your keyboard and press the T key to transform rotate them 45 degrees clockwise.
Create a new layer below MASTER and call it "IMAGE".
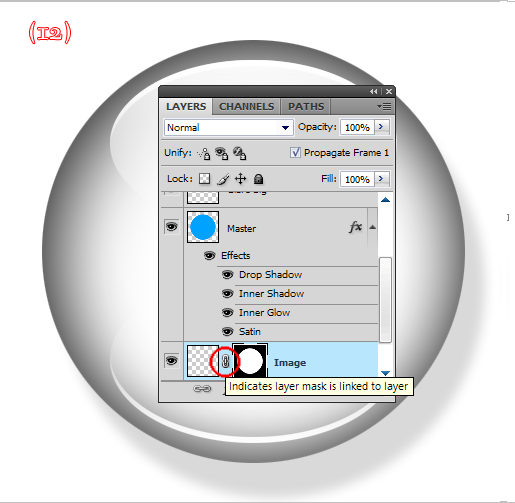
Hold CTRL on your keyboard and click the MASTER layer thumbnail to create a selection, then highlight the IMAGE layer and add a layer mask.
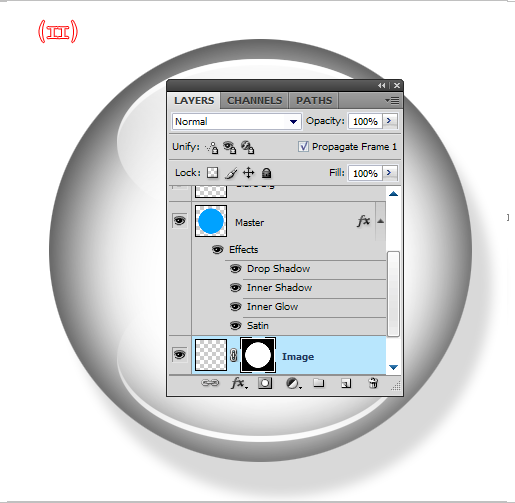
Uncheck the linkage between the IMAGE layer and it's newly created layer mask.
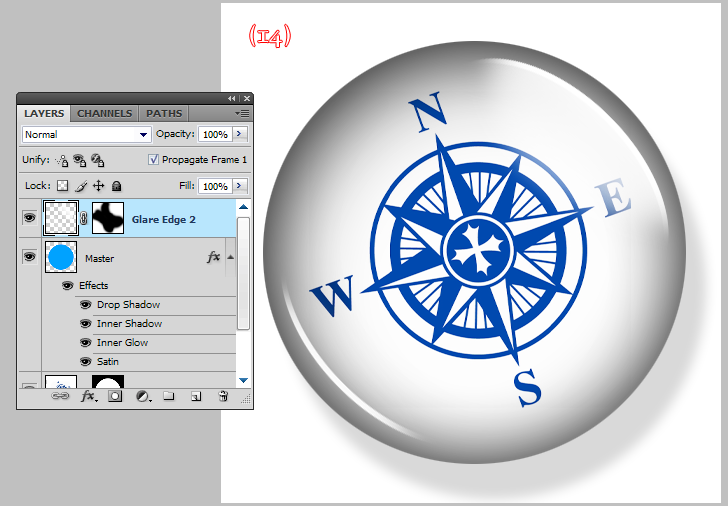
Now you should be able to paste into the IMAGE layer to apply pictures and other elements to your button. You can also merge all of the layers of glare to make the next steps easier.
Apply a layer mask to the merged GLARE layer and use a soft brush to erase the edges closest to the center of the button.
Double click the white background to change it into a layer you can turn on and off for transparency.
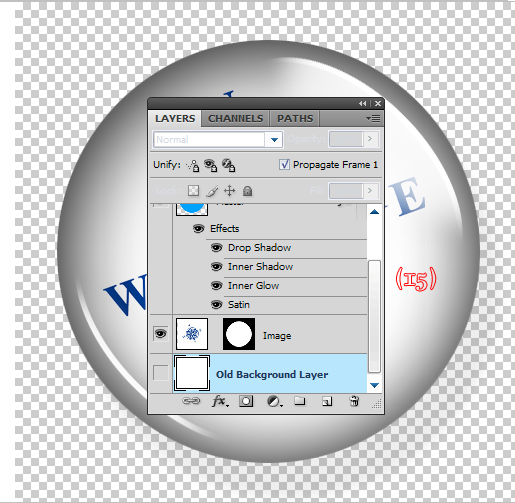
Apply the Gaussian blur filter to the merged GLARE layer to soften the look of the reflection.
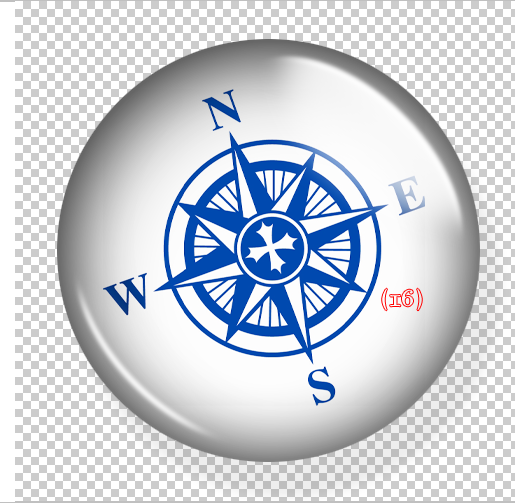
Done! |
|
|
|
|
 |
Patrick
Administrator

Joined: 14 Feb 2003
Posts: 11945
Location: Harbinger, NC, U.S.A.
|
| Posted: Thu Feb 03, 2011 5:21 pm Post subject: |
|
|
|
|
|
|
|
|
thehermit
Joined: 05 Mar 2003
Posts: 3987
Location: Cheltenham, UK
|
| Posted: Thu Feb 03, 2011 5:35 pm Post subject: |
|
|
Lol you couldn't resist the compass could you? Nice little tutorial Auieos  mmmm glossy. mmmm glossy.
_________________
If life serves you lemons, make lemonade! |
|
|
|
|
|
YourOnlySin
Joined: 23 Jan 2011
Posts: 230
|
| Posted: Thu Feb 03, 2011 6:15 pm Post subject: |
|
|
|
|
|
|
|
|
BYOU
Joined: 10 Feb 2011
Posts: 2
|
| Posted: Thu Feb 10, 2011 9:45 pm Post subject: |
|
|
Great tutorial. Thanks for sharing this cute button. |
|
|
|
|
|
Auieos
Joined: 29 Jan 2010
Posts: 2019
|
| Posted: Fri Feb 11, 2011 6:29 pm Post subject: |
|
|
Glad you all enjoy it. Hope it comes in handy one day. |
|
|
|
|
|
YourOnlySin
Joined: 23 Jan 2011
Posts: 230
|
| Posted: Sat Feb 12, 2011 10:40 am Post subject: |
|
|
|
|
|
|
|
|
synchronous
Joined: 27 Jul 2012
Posts: 6
|
| Posted: Mon Oct 22, 2012 7:03 am Post subject: |
|
|
|
|
|
|
|
|
thundertimmy007
Joined: 31 Dec 2012
Posts: 1
|
| Posted: Mon Dec 31, 2012 7:57 pm Post subject: |
|
|
greeaatt  thank you thank you |
|
|
|
|
|
|


