Posted: Fri Mar 21, 2014 10:11 pm Post subject: Manipulating Colour of a Scanned Watercolour illustration
Hi,
I am working on some watercolour illustrations for my children's book and I've run into an issue.
I would like to add more saturation to the colour. I have been doing this by adding a 'levels' layer and then adjusting the levels using the level sliders.
I am able to indeed add more saturation to the colour, but this method also introduces graininess and even makes the 'tooth' of the watercolour paper completely visible as a result.
Does anyone have a suggestion on how to digitally saturate my colour without introducing graininess.
Someone explained to me that there is a way to create a layer that sits behind my original layer and to play with the opacity of my illustration layer while adding a photoshop of a more saturated solid colour layer underneath. Not sure how to go about making that work.
Joined: 05 Mar 2003
Posts: 3987
Location: Cheltenham, UK
Posted: Sat Mar 22, 2014 7:03 am Post subject:
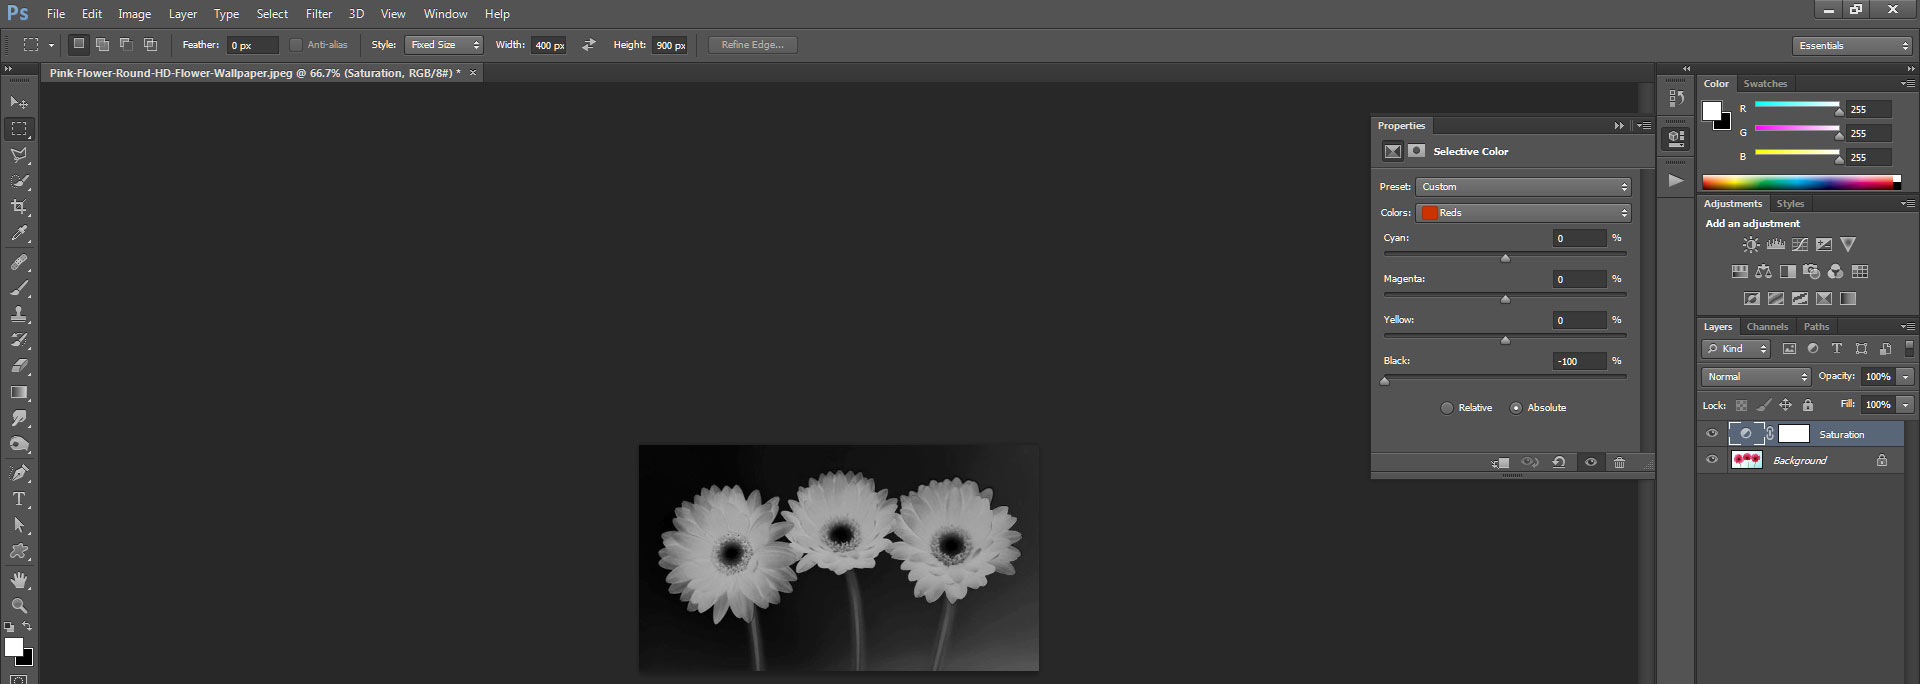
I would approach this differently from what you have already tried. Adding a levels layer will only effect the brightness/luminosity of the pixels not really the saturation.
To find out how and where your image is actually saturated or not, I would create a Saturation Help Layer by adding a Selective Colour Adjustment Layer and from Red through to Magenta move the black slider to negative -100% and from white, neutral and black move the black slider to +100%. This will give you a saturation mask. It should look like a negative image, white is the area of most saturation and black the least.
I would create an action for this for future use.
Now you have your saturation mask, you can use it as a help layer for a saturation adjustment layer, slotted below the satmask. Funnily enough, I use them to even out saturation in retouching, but conversely it can be used to inject saturation.
satmask.jpg
Description:
Filesize:
100.2 KB
Viewed:
453 Time(s)
_________________ If life serves you lemons, make lemonade!
Thanks. That sounds like it would give me what I want. Don't laugh, but I am on Photoshop CS. The user interface is outdated compared to what you're using so the steps might not match completely.
Under the layer menu I went to New Adjustment Layer, then Selective Color, I then get a pop up window that allows me to name my layer. There are other settings available on this pop up layer that I'm wondering if they are part of what I need to adjust.
There is a check box with 'Use Previous Layer to Create Clipping Mask' as well as an Opacity adjuster (defaulted at 100% opacity), a color selector (defaulted to None), and a mode adjuster (defaulted to Normal).
When I hit ok, there is a color adjuster (defaulted to Red), below that are sliders for Cyan, Magenta, Yellow and Black. At the bottom there is a selector where I can choose 'Relative' or 'Absolute'.
I left all the main settings in default and then with the sliders I moved the Cyan, Magenta, Yellow to -100%. I moved the Black to +100%. When I hit ok and then looked at the new mask I created there was nothing there. Just the black and white squares that you see when you have a transparent background.
Joined: 05 Mar 2003
Posts: 3987
Location: Cheltenham, UK
Posted: Sun Mar 23, 2014 5:50 am Post subject:
Hi again.
Sorry for the delay in response. So the steps again for clarification. Add a Selective Colour Adjustment Layer and for Red,Yellow, Green, Cyan, Blue & Magenta, move the black slider to -100% for the White, Neutral & Black, move the slider to + 100%. I did neglect to mention that it should be in ABSOLUTE mode.
There is another option to create a Saturation Mask, if you navigate to your extra folder in your PS installation disk/folder and go to the Goodies folder, you will find the HSB Plugin, if you install the plugin (find it under the filter menu in PS) this will render Hue, Sat and Luminosity. It basically remaps the RGB channels to the corresponding HSL values, so for your purposes the Green Channel would be Saturation. Ctrl click the green channel to load the values and create your mask.
If all of that is as clear as mud or you still have issues get back and I will provide a link to an action, so you can examine the steps.
Not sure about your version of PS, but I use CS6 and don't think that the adjustment layer function has altered between versions. _________________ If life serves you lemons, make lemonade!
You cannot post new topics in this forum You cannot reply to topics in this forum You cannot edit your posts in this forum You cannot delete your posts in this forum You cannot vote in polls in this forum You cannot attach files in this forum You can download files in this forum