|
|
| Author |
Message |
slice 'n' dice
Joined: 31 Aug 2004
Posts: 3
|
 Posted: Tue Aug 31, 2004 7:50 am Post subject: Solar Explosion Posted: Tue Aug 31, 2004 7:50 am Post subject: Solar Explosion |
 |
|
Here's a tutorial I made for a solar explosion and by the way, I'm new. 
1. Open a new image that is 400X400 with a black background.
1 1/5. Press D to switch to default colors.
2. Create a new layer, select filter noise/add noise and set the amount to 21 and distribution as Gaussian and then set it to monochromatic.
3. Select stylize/glowing edges and set edge width to 2, edge brightness to 6 and smoothness to 5.
4. Next select stylize/wind with default settings from right and then do the same, but from left.
5. Go to image/rotate canvas/90 degrees clockwise and repeat step 4 an then go to image/rotate canvas/90 degrees counter clockwise.
6. Go to filters/texture/texturize and leave the default settings.
7. Go to render/lighting effects and set style as default, light type as omni, intensity as 78, gloss as 100, material as 69, exposure as 7 and ambiance as 10 - remember you don't have to be exact - just get as close as you can by moving the sliders).
8. Press CTRL+J to duplicate the layer.
9. On the top layer hit CTRL+L to bring up levels and change the middle input level to .1.
10. Press CTRL+U to bring up the hue/saturation window and click colorize, then input these settings: hue at 54, saturation at 100 and lightness at -14.
11. Turn off the bottom layer by clicking its little eye symbol.
12. Go to the bottom layer and hit CTRL+U again and click colorize as usual and enter in these settings: hue at 0, saturation at 100 and lightness at -44.
13. Turn the top layer on again by clicking the space where the eye symbol was and select that layer.
14. Change the blending mode to linear dodge (the blending mode is the space that should say "normal" by default).
15. Now you should have a red image with a yellow blob in the center. You could leave this as is, but lets make it look cool(er).
16. Select the bottom layer and go to filters/blur/radial blur and use these settings: amount to 44 and then check zoom and good.
17. Select the top layer and go to filter/blur/Gaussian blur and set the radius to 1.
OK, there you go. It should look something like this.
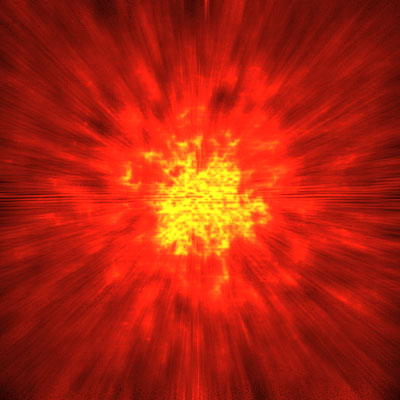
You can play around with the brightness depending on what you want to do. Have fun! |
|
|
|
|
 |
slice 'n' dice
Joined: 31 Aug 2004
Posts: 3
|
| Posted: Fri Sep 03, 2004 1:33 am Post subject: |
|
|
dudes, why arent you replying? |
|
|
|
|
|
thehermit
Joined: 05 Mar 2003
Posts: 3987
Location: Cheltenham, UK
|
| Posted: Fri Sep 03, 2004 5:06 am Post subject: |
|
|
I havent replied because as a photographic restorer it has no practical use or application to me. However, good on you for contributing.
_________________
If life serves you lemons, make lemonade! |
|
|
|
|
|
TiDaL

Joined: 12 Apr 2003
Posts: 384
|
| Posted: Fri Sep 03, 2004 7:27 am Post subject: |
|
|
great teqnique, i do a lot of space art however different people have different styles so i d obut i will use it but i did read it and enjoyed it, mayb elater on i will mix that with something else... who knows but i really enjoy tutorials because that teaches people a lot
so thanx for makin the tut
_________________
http://i337m1k3.deviantart.com for my ART Profile. |
|
|
|
|
|
BryanDowning

Joined: 05 Jul 2004
Posts: 1554
Location: California, USA
|
| Posted: Fri Sep 03, 2004 12:16 pm Post subject: |
|
|
I like the effect a lot, but I don't think I'll be able to use it for anything. My only suggestion is to find a way to make it look a little more sharp and clear. Well done though.
_________________
Best Regards,
Bryan Downing
bryandowning.com |
|
|
|
|
|
ThatRickGuy
Joined: 07 Sep 2004
Posts: 1
|
| Posted: Tue Sep 07, 2004 11:28 am Post subject: |
|
|
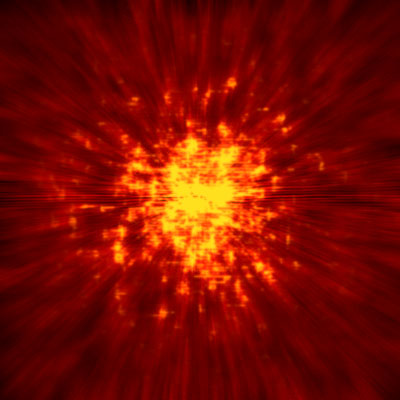
I actually found this quite helpful. If you create this 'sun burst' larger then desired and resize it down a tad, it'll smooth out some of the horrizontal gitters arround the middle. I used this tutorial to throw together this emblem for a friend.

-Rick |
|
|
|
|
|
BryanDowning
Joined: 05 Jul 2004
Posts: 1554
Location: California, USA
|
| Posted: Tue Sep 07, 2004 5:00 pm Post subject: |
|
|
wow that looks good.
_________________
Best Regards,
Bryan Downing
bryandowning.com |
|
|
|
|
|
Jersey Hacker
Joined: 08 Jun 2005
Posts: 864
Location: Jersey, Channel Islands, UK
|
| Posted: Sat Jul 30, 2005 12:00 pm Post subject: |
|
|
Yeh, nice use of a nice tutorial, thanks slice 'n dice
_________________
www.jerseyhacker.co.uk
Free File Uploader for Everyone to use |
|
|
|
|
|
Datameister

Joined: 28 Jun 2005
Posts: 506
|
| Posted: Sat Jul 30, 2005 10:23 pm Post subject: |
|
|
Very nice. I think the colors could use just a little work, and like TiDaL said, I probably won't use this specific effect. But some people find this sort of tutorial extremely helpful. In any case, it's always nice to see a new effect. Keep up the good work!
_________________
Interested in showcasing your special effects or learning some new ones from the masters? Check out PSFX! |
|
|
|
|
|
mantis8
Joined: 10 Feb 2007
Posts: 9
|
| Posted: Sun Feb 11, 2007 4:05 am Post subject: |
|
|
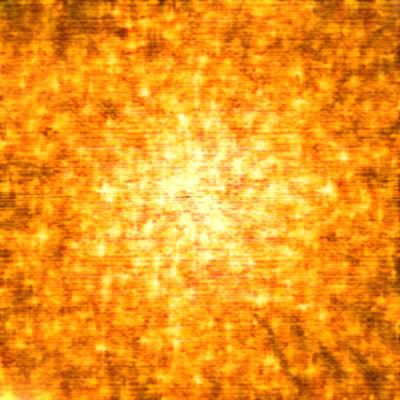
wht is mine coming out like this
 |
|
|
|
|
|
|


