|
|
| Author |
Message |
jjochems78
Joined: 09 Nov 2009
Posts: 21
Location: Lansing, MI
|
 Posted: Tue Apr 13, 2010 10:49 am Post subject: Getting perfect symmetry in a photograph via PS CS4 Posted: Tue Apr 13, 2010 10:49 am Post subject: Getting perfect symmetry in a photograph via PS CS4 |
 |
|
So I took this shot and once I started editing it in photoshop. I felt that the symmetry needed to be completely perfect for this shot. So after four or five hours..... ugh.... of my pushing my anal-retentiveness into territory I never knew of beforehand. I had to work with a series of cut copy pasting methods, lens correction, and working with skewing and perspective transforming to give me the end result. Which is pretty subtle. In the process of doing this I discovered that PS had a grid which could be overlaid over the image. I didn't know this before.
My question is.... What else have people used here to try to get a better symmetry to their work? I just have the feeling that there's some other tricks I might have been missing in order to get the results I had. I especially had that feeling at the end of the 4-5 hour stretch I had working on this one shot.
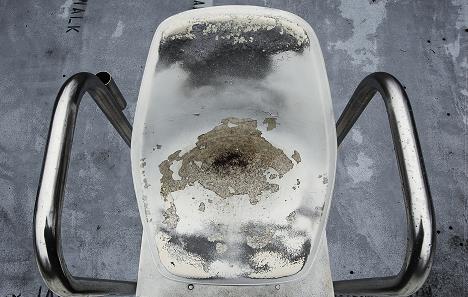
| Description: |
| This was the final product |
|
| Filesize: |
46.16 KB |
| Viewed: |
419 Time(s) |
|
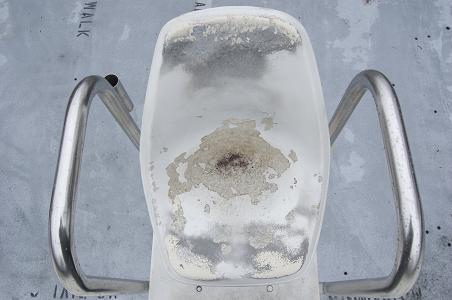
| Description: |
|
| Filesize: |
30.8 KB |
| Viewed: |
419 Time(s) |
|
|
|
|
|
|
 |
niftyned
Joined: 07 Mar 2010
Posts: 154
Location: Australia
PS Version: CS4
OS: Windows7
|
| Posted: Tue Apr 13, 2010 11:50 am Post subject: |
|
|
Seriously, 4 or 5 hours? I really cant see more than about half an hour worth of result. one trick I use when trying to achieve symmetry is to find the approximate centre line of the image and then select one half and duplicate it then flip it and realign the centre, then sometimes you can just blend that and call it finished, depending on the subject matter. Mostly though I use the flipped section as a guide by laying it over the half to be edited and reducing the opacity so you can see through it and then pull and prod and beat the image underneath into the required shape.
_________________
The only limitation is my imagination. |
|
|
|
|
|
hawkeye
Joined: 14 May 2009
Posts: 2377
Location: Mesa, Az
OS: Windows 7 Pro 64 bit
|
| Posted: Tue Apr 13, 2010 12:38 pm Post subject: |
|
|
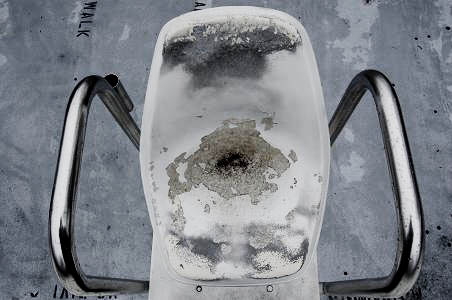
You might want to discuss your workflow if that edit took 4-5 hours. I did this in less than a minute.
| Description: |
|
| Filesize: |
33.17 KB |
| Viewed: |
408 Time(s) |
|
|
|
|
|
|
|
jjochems78
Joined: 09 Nov 2009
Posts: 21
Location: Lansing, MI
|
| Posted: Tue Apr 13, 2010 3:25 pm Post subject: |
|
|
Some of the reasons it took so long is alot that mistakes were made. I had tried to do the job completely in Lens correction first and then just using perspective transforming. Neither one worked. Basically what I wanted to do was to be able to look at the shot underneath a grid and have everything lined up perfectly. The arms level, the distance between both arms and the seat itself exactly the same. So after trying several methods that didn't work I had to separate the picture into separate layers. The seat was the first layer I worked on so I treated that one first in order to get it lined up perfectly. Then the diving board which I had to cut copy and paste a bit in order to get the right side at the same angle as the left side without making it look too stretchy. And then the arms which was me doing separate edits to both sides with skewing and perspective to get them to line up. And then I resized all three layers to make it look as natural as possible. The curves and saturation was the final step, which took just a few minutes.
I had thought of the whole mirroring trick but I was being too much of a purist I guess on this picture. Way too much of a purist I suppose. But the end result it that if you open this picture in PS and look at it under the grid. Everything is lined up perfectly. How might you have done it?
|
|
|
|
|
|
hawkeye
Joined: 14 May 2009
Posts: 2377
Location: Mesa, Az
OS: Windows 7 Pro 64 bit
|
| Posted: Tue Apr 13, 2010 3:56 pm Post subject: |
|
|
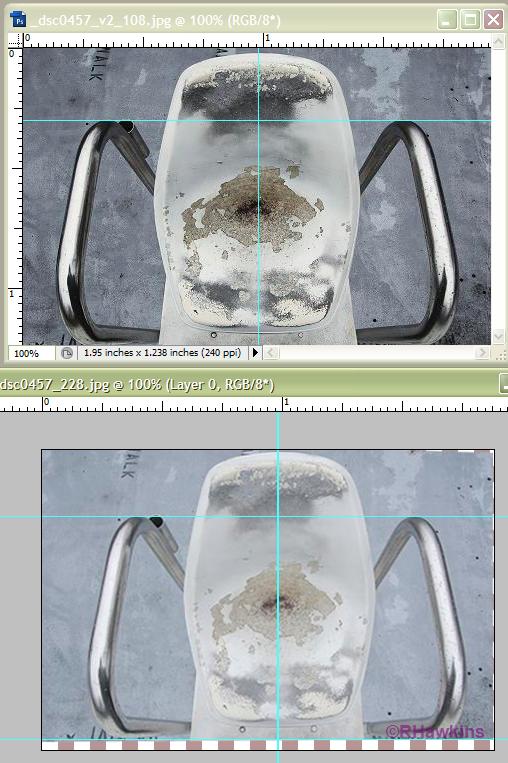
I dragged a vertical and horizontal guides onto the canvas then used transform-distort to fit it to them.
Obviously you'd have to crop it and clone a little on upper right corner, but it only took a minute and I think it's pretty close to yours. (I added the guides on yours for comparison)
| Description: |
|
| Filesize: |
73.4 KB |
| Viewed: |
400 Time(s) |
|
|
|
|
|
|
|
|


