|
|
| Author |
Message |
Ivan55
Joined: 06 Feb 2011
Posts: 6
Location: Illinois
|
 Posted: Sat Feb 12, 2011 1:00 pm Post subject: Swirl Background Effect for Text and Shapes Posted: Sat Feb 12, 2011 1:00 pm Post subject: Swirl Background Effect for Text and Shapes |
 |
|
In this tutorial, we are going to make a swirl background that can serve as the backdrop for text and/or shapes. First, let's start with a canvas size of 800x600 pixels with a white background.

Next, I select black for my font and set size to 30.

I click on the color red to switch the text to red and then I use the Magic Wand (tolerance set to 30 with contiguous checked) to select the text.
Following this I apply inverse to it to capture only the text by clicking on Select > Inverse. Then click Edit > Copy. This gives you a red version of the text, which we'll use later.
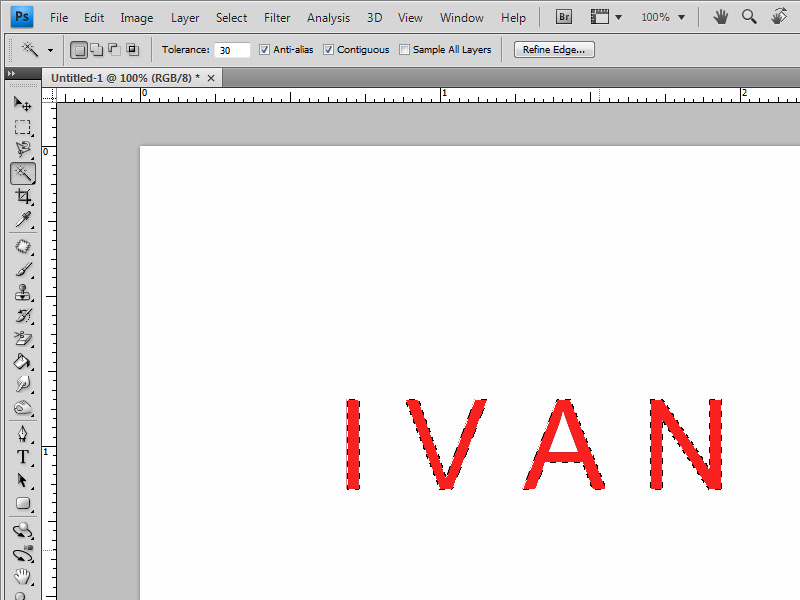
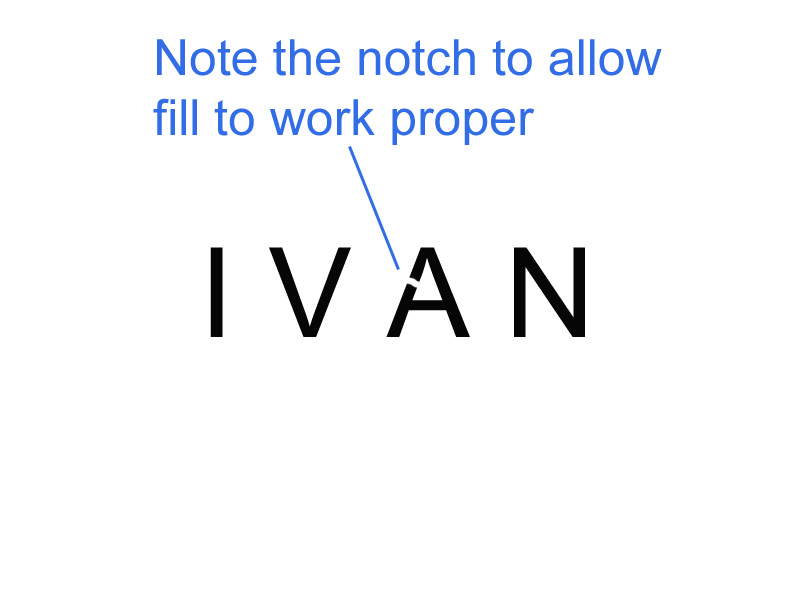
Now hold SHIFT and ALT on your keyboard. Press the Z key and continue to press it until your text is back to black with no selection. Once you have all black text again, click on eye dropper and click in the white area somewhere.
Next, using the paint brush on the small size setting, make a small notch through any letters or shapes that are enclosed. This is to allow the filling of swirled design to be within these enclosed areas when done. In this case, we have the letter A.
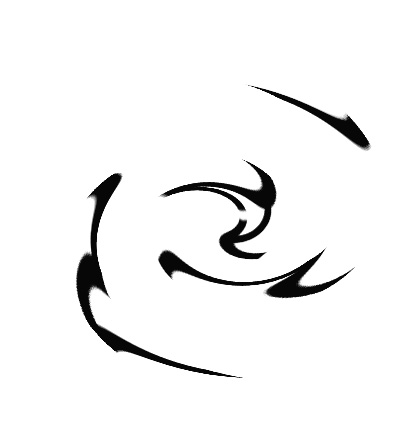
Next, go to Filters > Distort > Twirl and set twirl amount to 415. Click OK.

Your image should look like this:
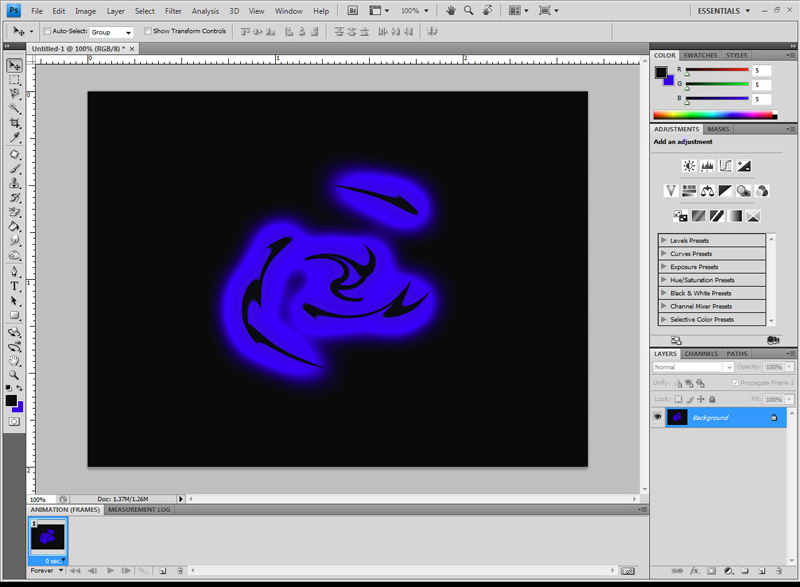
Make sure the foreground is set to black and go to Filters > Artistic > Neon Glow and, in my case, I had settings as glow size: 22, glow brightness: 50 and color: blue. Click OK.

Your image should look like this:
Next, go to Filters > Artistic > Plastic Wrap. My settings were as follows: highlight strength: 15, detail: 9 and smoothness: 7. Click OK.
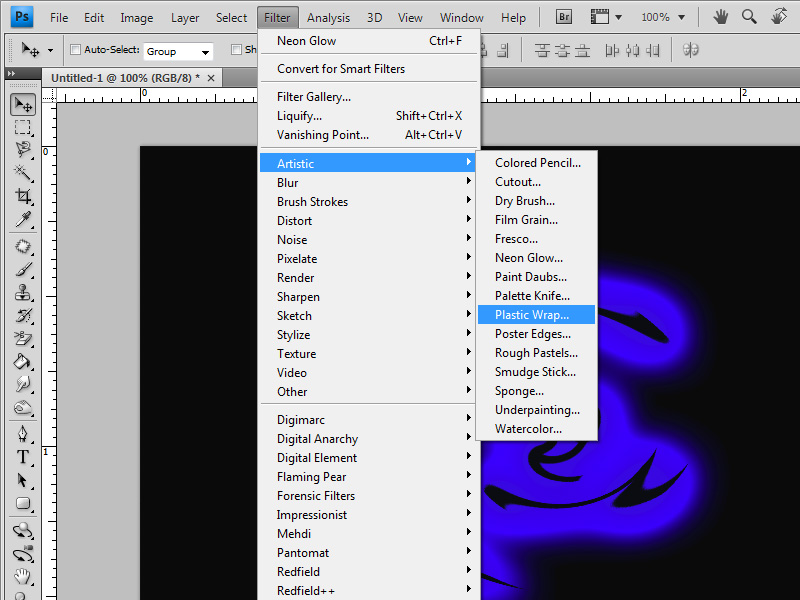
Your image should look like this:
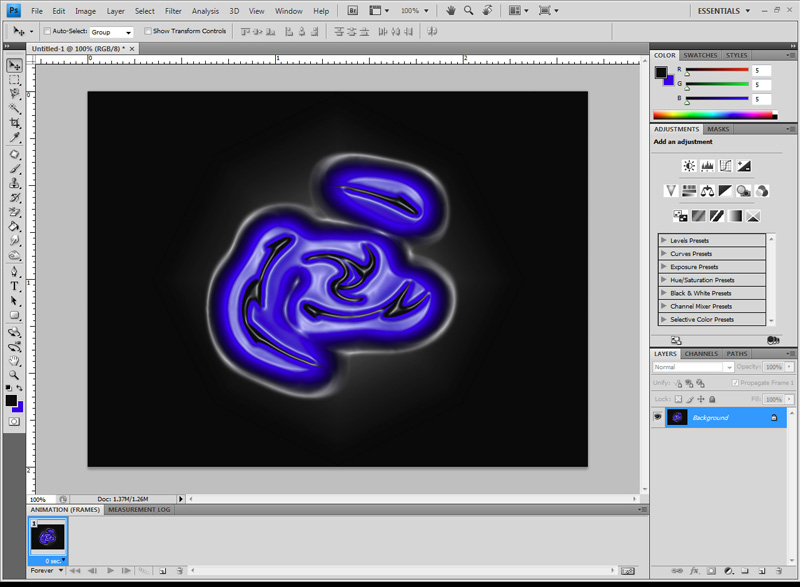
Now, go to Filters > Distort > Twirl and, while still on the same original number (twirl amount), just add a negative sign, or a dash ("-"), in front of this number to make it unwind the original twirl the same amount it twirled in first place.
Mainly, What you have done now is revert back to your original text but twirled the neon glow and plastic wrap effect and it will always blend around what you have written without any text sticking out.

The text will appear kind of like it is underwater but that is the reason for next step.
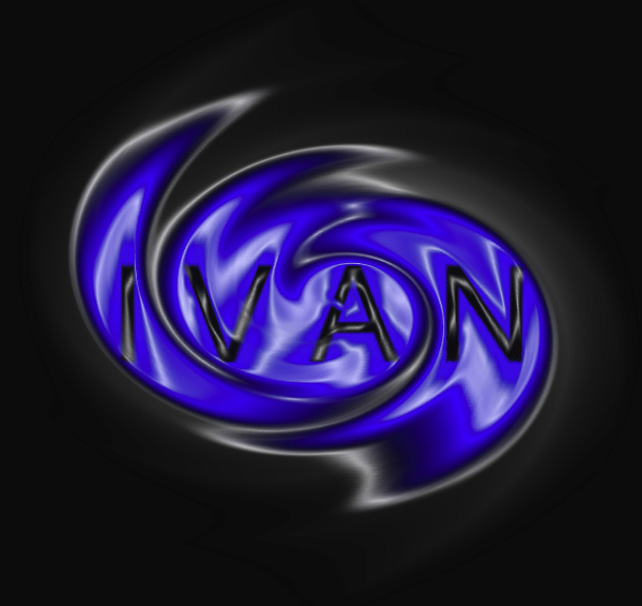
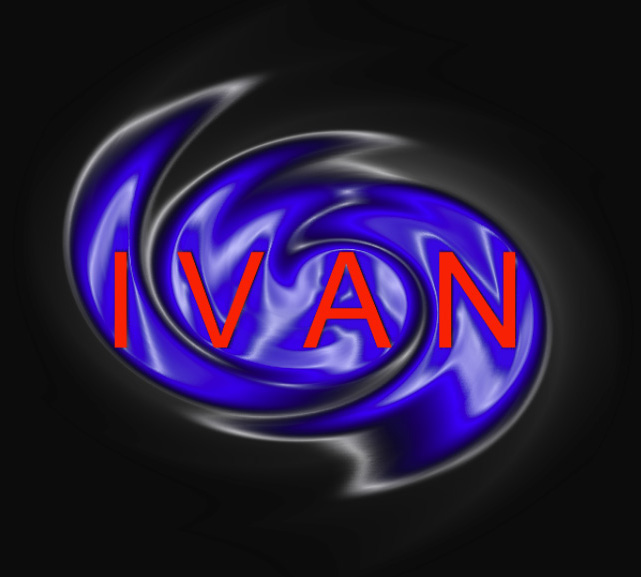
Make a new layer by clicking the new layer option at bottom of your layer panel on right side. Go to Edit > Paste to place the red text we made earlier. Go to Filters > Artistic > Plastic Wrap and apply it to the new layer so that the red text has more of a stylized design to it.
Click on your move tool (black arrow at top of toolbar on left side) and click on new layer and then hold and slide it around until your red text aligns with your black text. Sometimes I offset the red text a bit to add edges to it.
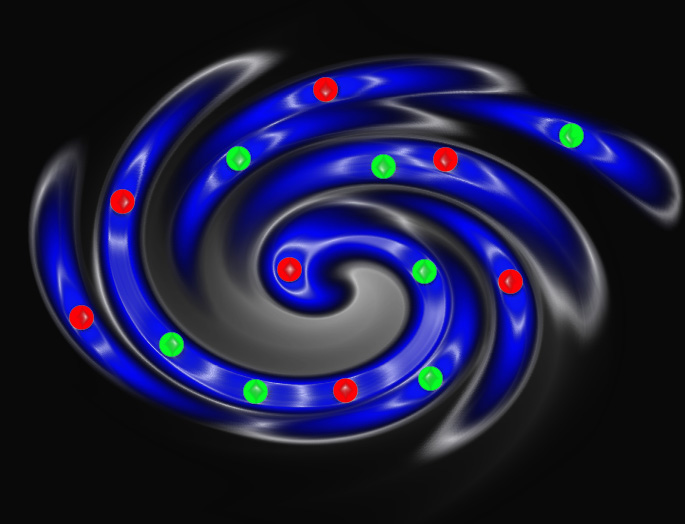
Today I tried using dots instead of text or lines. It was interesting, I think. Like I said before in the forum the other day, I am very new to this and I am sure several steps could be refined but this is how I did it for now.
Thank you for your interest in this and I would like to see what you do with it. 
_________________
Definition of insanity is repeating the same behavior over and over again , expecting different results. - Albert Einstein |
|
|
|
|
 |
Patrick
Administrator

Joined: 14 Feb 2003
Posts: 11945
Location: Harbinger, NC, U.S.A.
|
| Posted: Sat Feb 12, 2011 1:07 pm Post subject: |
|
|
|
|
|
|
|
|
thehermit
Joined: 05 Mar 2003
Posts: 3987
Location: Cheltenham, UK
|
| Posted: Sat Feb 12, 2011 5:20 pm Post subject: |
|
|
Interesting technique, thanks for the submission.
_________________
If life serves you lemons, make lemonade! |
|
|
|
|
|
Photoshop Warrior

Joined: 21 Mar 2011
Posts: 19
Location: USA
|
| Posted: Fri Jul 01, 2011 11:28 am Post subject: |
|
|
I found the tutorial very simple and easy, good job
_________________
Master Photoshop FAST and become a Photoshop Warrior! with The Ultimate Photoshop Course! |
|
|
|
|
|
sakhsen

Joined: 17 Mar 2011
Posts: 12
Location: India
|
| Posted: Tue Jul 05, 2011 12:02 am Post subject: |
|
|
Interesting and easy to learn. Thanks for sharing
Regards
Sakhsen |
|
|
|
|
|
jokelly
Joined: 05 May 2011
Posts: 2
Location: Tokyo
PS Version: CS2
OS: Windows 7
|
| Posted: Sun Oct 23, 2011 1:34 am Post subject: |
|
|
Thanks for sharing, this is kind of a cool technique. Can see myself using something like this when trying to go for a psychedelic type look.
_________________
My blog: luminess air makeup. More details are on this page luminess air reviews if you are interested to see more. |
|
|
|
|
|
hytham
Joined: 17 Nov 2011
Posts: 37
Location: 64
|
| Posted: Sun Dec 11, 2011 8:55 pm Post subject: |
|
|
Nice lesson
Thank you |
|
|
|
|
|
SarahPerez10
Joined: 30 Aug 2010
Posts: 13
|
| Posted: Wed Dec 28, 2011 12:45 am Post subject: |
|
|
Nice post,
Thanks for sharing the informative post. |
|
|
|
|
|
Karl
Joined: 31 Mar 2012
Posts: 5
Location: Liverpool
|
| Posted: Mon Apr 02, 2012 9:44 pm Post subject: Well done |
|
|
i certainly like the way you used your username to make the picture im probably going to use that feature in any of my future reference. |
|
|
|
|
|
esprintguy
Joined: 17 Feb 2012
Posts: 14
|
| Posted: Sat Apr 07, 2012 8:31 am Post subject: |
|
|
Very interesting! I think I'll try this out for myself. Personally I like what you tried before you tried out the colored dots, but that's just me. Thanks for sharing! |
|
|
|
|
|
|


